
cropper
Raleigh Better Home Living
  • Home
  • Categories
    • DIY Projects
    • Smart Home Tech
    • Home Maintenance
    • Interior Design
    • Lawn and Garden
    • Design Trends
    • Draft or Deletes
  • Adding Value to Your Home
  • Feature Local Businesses
December 04.2025
3 Minutes Read

Maximize Space with Creative Small Bathroom Decorating Ideas

Decorating Ideas for Small Bathrooms

Transforming Small Bathrooms: Creative Solutions for Spacious Living

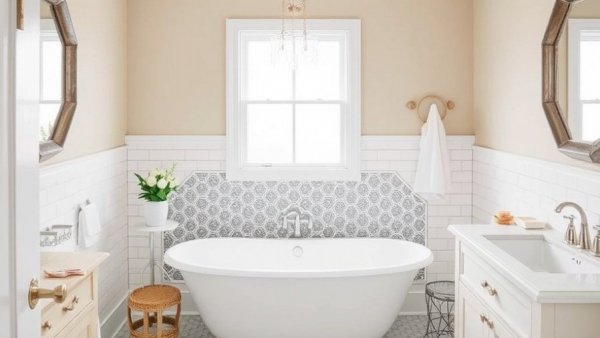
For homeowners grappling with small bathroom spaces, the pursuit of practicality and style may feel like an uphill battle. A well-designed small bathroom can still be functional and aesthetically pleasing. Embracing innovative storage solutions can make a big difference in how these compact areas are utilized. Let’s explore some genius decorating ideas and organization hacks that promise to elevate even the tightest quarters.

Embrace Vertical Space: The Key to Small Bathroom Functionality

When floor space is at a premium, the walls become your best friend. Consider adding floating shelves above the toilet or in corners, which can hold everything from toiletries to decorative plants, thus maximizing functionality without the clutter. Want to level up your storage game? Try a decorative ladder shelf or a tall cabinet that utilizes vertical height and offers additional storage options.

Smart Organization Hacks: Keeping Clutter at Bay

Another essential strategy is to adopt small bathroom organization techniques. Using over-the-door organizers can free up significant space by keeping products within reach yet out of sight. These handy accessories aren’t just for shoes—dedicated bathroom versions can make storing hair care products and toiletries a breeze. Pair this with sleek under-the-sink organizing carts to maximize hidden storage.

Multi-Functional Furniture: Efficiency in Design

Small spaces benefit greatly from multi-functional furniture. Look for vanities with built-in storage solutions to minimize clutter and create a cohesive design. Throughout the bathroom, select furniture that serves dual purposes, such as stools that store items or mirrors with hidden compartments. With thoughtful arrangements, even the smallest bathrooms can feel spacious and inviting.

Bringing in Natural Light: Clearing the Air

Another often-overlooked aspect of small bathroom design is lighting. A well-lit bathroom can feel instantly bigger. Consider installing a larger mirror or a frosted glass window to maximize natural light. Layering artificial light with decorative fixtures can enhance visibility and give the illusion of more space.

Incorporating Color and Texture: Design That Speaks

Don’t shy away from color—opt for light shades or playful accent colors to create visual interest. Textured walls or patterned tiles can add depth, making the space feel more luxurious without overcrowding. Just remember, the goal is to create a sense of harmony and balance.

Embrace Innovative Products: Solutions for Today’s Needs

With eco-friendly trends shaping consumer behavior, homeowners are looking for innovative products that serve dual purposes. For instance, modern bidet toilet seats not only improve hygiene but also eliminate the need for bulky toilet paper storage. This is a smart choice for saving both space and money in the long run.

Your Journey to a Serene Small Bathroom

Ultimately, transforming a cramped bathroom into a serene space doesn’t have to be overwhelming. Start small; implement one or two ideas at a time and adjust according to your needs. Each change can make a significant difference in maximizing functionality while also enhancing the beauty of your home. Take pride in your space and invite enjoyment back into the everyday routine of personal care and relaxation.

Now that you’ve been inspired to rethink your small bathroom's potential, take action! From wall-mounted shelving to multi-functional designs, the possibilities for enhancement are endless.
Interior Design

40 Views

0 Comments

Write A Comment

*
*
Please complete the captcha to submit your comment.
Related Posts All Posts
11.19.2026

Transform Your Dollar Tree Lantern Into a Festive Accent Piece

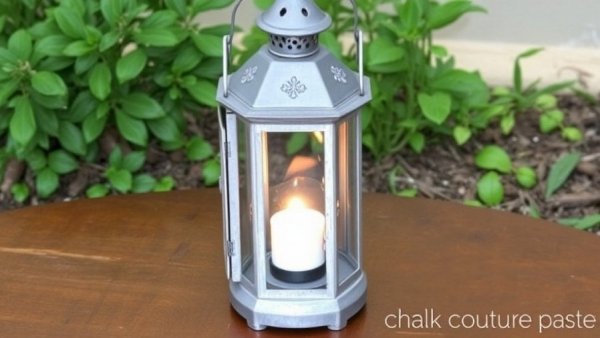
Update The Charm of a Dollar Tree Lantern Makeover Transforming a simple plastic lantern into a charming Christmas decoration is a delightful project to embrace, especially for homeowners looking to enhance their living spaces during the festive season. With just a few materials and some creativity, the Dollar Tree Flame Glow Lantern can be elevated into a sophisticated accent piece that captures the holiday spirit. Materials You Need for a Stunning Transformation Your first step involves gathering everything you need for this makeover. In addition to the plastic lantern, you'll want Chalk Couture paste in black and a metallic shade like My 2¢, which mimics the look of aged metal. Don't forget to pick up some greenery and accents such as red berries, which can create an inviting seasonal feel. These materials are affordable and easily sourced from your local Dollar Tree, keeping your project budget-friendly while maximizing your creativity. Preparing the Lantern: Your First Step to Success The look you create is only as good as the preparation you undertake. Begin by lightly sanding the plastic surface of your lantern to allow the paste to grip better. This step is crucial; it gives the lantern a textured surface that enhances the finished look. Remember, you're aiming to scuff rather than reshape, which will make the subsequent layers sit beautifully on top. Painting with Chalk Couture: A Smooth Finish Once your lantern is sanded, it's time to apply the first coat of your black Chalk Couture paste. This step is where your lantern begins to take on a new character. The flatter, matte finish of the paste will help disguise any remaining glossy areas of the plastic, making it appear more like painted metal. Be sure to do a quick check with the fingernail test after the first coat to ensure it’s dried and ready for the next exciting phase of the project. Creating a Beautifully Weathered Look This is where your creative instincts come into play – apply the metallic paste selectively, brushing it onto random areas of the lantern. The contrast between the flat black base and the hints of metallic will mimic the look of an aged piece, as if it’s spent seasons outdoors. This approach infuses warmth and depth into the lantern, turning it not just into a decoration but a conversation piece. Embellishing with Greenery and Colorful Touches Now that the base is beautifully finished, it's time to add some festive decor! Use both eucalyptus and red berries to create an eye-catching design on the lantern. Being asymmetrical is not only okay, it's preferred. This allows the greenery to form a soft, natural look that complements the overall rustic style of the lantern. Why DIY Projects are Good for the Soul Engaging in DIY projects like this makeover can be incredibly fulfilling. Not only do you end up with a unique decor item, but the process of crafting can also reduce stress, improve mental clarity, and enhance your sense of achievement. This project allows you the freedom to express your creativity while also promoting mental wellness – a win-win! Final Thoughts: Celebrate Your Creativity! Your finished lantern will not only add charm to your home during the holidays but will also serve as a testament to your creativity and ability to enhance your living space. When you invest time in DIY projects, you not only create functional items but also weave memories that will be cherished for years to come. So, embrace your creativity today and give your home the festive touch it deserves!

11.17.2026

Unlock the Beauty of Your Kitchen with Wood Burning Gel on Serving Boards

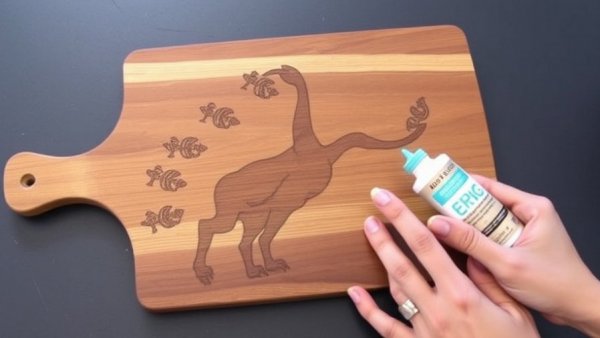
Update Transform Your Serving Board: The Art of Wood Burning Gel Creating a warm and inviting kitchen atmosphere is a joy for many homeowners, especially during the festive season. One wonderful way to personalize your space and share love through gift giving is by transforming a simple wooden serving board into a charming decoration using wood burning gel. This beautiful technique not only adds character to your kitchen but makes for an affordable and thoughtful gift. Choosing the Right Wood Board for Your Project When embarking on your wood-burning journey, the first step is selecting the perfect wooden board. You can easily find affordable options in craft stores or even the Target Dollar Spot! Make sure to look for a smooth, unfinished surface, as imperfections might show when the design is burned in. If you notice any labels or deep grain, consider turning the board over or sanding lightly to prep your canvas. Wood types like pine, oak, or cherry can yield different results, so embrace the natural variations that make each piece unique. Getting Started: Applying the Wood Burning Gel Once you have your board, it’s time to apply the wood burning gel. The gel typically comes thick and needs stirring to ensure smooth application. Using a reusable transfer design, firmly place it on your board. Add decorative elements that complement your central theme, allowing your creativity to flow. When you’re ready, spread the gel onto the open areas of the transfer—make the most of your supplies by scraping any excess back into the container. This step can lead to multiple projects with just one gel tub! Activating the Design: The Role of a Heat Gun This is where the magic happens! You will need a heat gun, as a hair dryer won’t provide the necessary temperatures to activate the gel properly. Keep the heat gun moving to ensure even burning, watching as your design darkens beautifully. This stage is thrilling as you witness the transformation of your board, creating a personalized piece that promises to engage your guests and family alike. Perfecting Your Design: Seasonal Touches After achieving that beautiful burned look, consider enhancing your serving board with decorative accents. For the festive season, a touch of red ribbon with greenery can convey a cozy holiday vibe. This allows your kitchen decor to remain versatile year-round—swap out the seasonal decorations easily without losing the personalized charm. Year-Round Appeal and Long-Term Durability The beauty of using wood burning gel lies in its permanence; once the design is burned in, it becomes part of the board, making this project more than seasonal—we’re talking timeless kitchen decor! The word 'home' etched into your serving board resonates beyond the holidays and adds warmth to your daily meals and gatherings. Your Step-by-Step Roadmap to Crafting 1. **Select your wooden board**: Make sure it’s smooth and free from imperfections. 2. **Prep your design**: Use a transfer and wood burning gel, applying carefully and generously. 3. **Activate with heat**: Employ a heat gun for the final touch, making sure to maintain even heat application. 4. **Add accents**: Consider seasonal decor to make your design pop, and remember these can be interchanged based on the time of year. By following these steps, not only do you create a delightful kitchen accessory, but you also foster skills and enjoyment in crafting that can lead to even more projects over time. Embrace the art of DIY with wood burning gel. Get ready to impress your family and friends with your crafting prowess! Your Invitation to Create Now that you’ve learned how to turn a simple wooden serving board into a stunning piece of art with wood burning gel, why not gather your crafting supplies and give it a try? Whether for your own kitchen or as a heartfelt gift, this project offers a chance to share warmth and creativity from your home. Dive into the world of DIY and let your creativity shine!

11.13.2026

Unleash Your Creativity: How to Make a Sublimation Shirt at Home

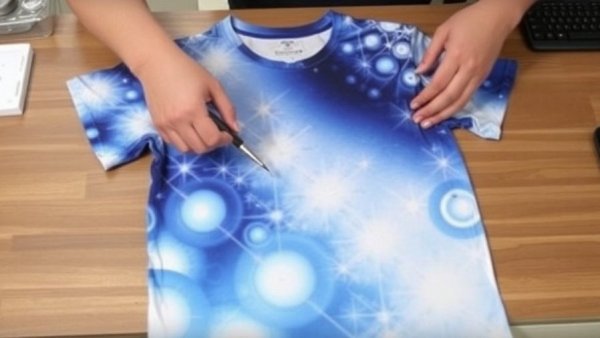
Update Unleashing Creativity: Your Guide to Making Sublimation Shirts at Home Sublimation printing isn't just a trend; it’s a way to express your personality through custom clothing. As the winter season approaches, there's no better time to create seasonal shirts that make a statement. I recently crafted a charming snowy-themed shirt featuring the design from Snowy’s Creamery, blending warmth and style into one cozy piece perfect for chilly afternoons. If you're considering diving into sublimation, this guide will walk you through all the steps to craft your own special piece without a hitch. Why Choose Sublimation for Your DIY Projects? Sublimation printing offers an exciting array of advantages for DIY enthusiasts. Unlike traditional printing, sublimation uses heat to transfer dye onto fabrics, creating a vibrant, long-lasting design that feels like part of the fabric itself. This method is especially suitable for light-colored materials, maximizing color vividness. Moreover, it allows for intricate designs to be printed without the limitations that usually come with other printing methods. For instance, my Snowy’s Creamery design brings all the winter vibes to life with its playful theme and vivid colors. It’s not just a shirt; it’s a canvas for creativity. The Importance of Fabric Choice in Sublimation When embarking on a sublimation project, fabric content matters deeply. Ideally, you'll want to choose shirts with a higher polyester content due to its capacity to hold dye. For example, my chosen shirt, which is 62% polyester, worked wonders. Previously, I’ve used shirts with as much as 65% polyester and found that they offered even better results in terms of brightness and clarity of the print. Additionally, remember that sublimation works best on white or light-colored fabrics. The absence of a white base means the vibrant colors of your design will shine through, whereas darker colors tend to obscure the ink, resulting in duller designs. Selecting the Right Tools and Supplies Before starting, make sure to gather all necessary supplies. Here’s what I used for my project: Light 62% polyester shirt Snowy’s Creamery sublimation design Heat press Heat-resistant tape A wool mat for pressing Parchment paper for added security Having everything ready will streamline the process and eliminate potential hiccups along the way. Preparing Your Shirt for Sublimation Preparation is key to achieving excellent results. To start, lay your shirt flat on the wool mat and smooth out any wrinkles. This step is crucial for ensuring even contact between the design and fabric. For thinner shirts, placing a piece of parchment paper inside may help prevent any dye from bleeding through onto the back side. Once you’ve prepped, carefully position the sublimation design where you want it. Remember, the sublimation process is permanent, so take your time to ensure everything is perfectly aligned. Pressing the Design: Tips and Techniques Next, it’s time to get pressing! Heat your press to 360 degrees Fahrenheit and set the time to 60 seconds, as per the instructions from the design package. After the initial press, take a peek. If certain areas, like the reds in my design, aren’t vibrant enough, don’t hesitate to press them again. Be mindful of how hot everything gets and maintain a secure hold on the design. Any movement can lead to smudged images or shadowing effects, which are best avoided. The Joy of a Custom Creation The sense of accomplishment that comes with making something unique is gratifying. Creating my Snowy’s Creamery shirt not only gave me a wearable piece of art to enjoy throughout winter but also offered me the chance to connect more deeply with my creative side. When you approach sublimation, you’re not just crafting garments; you’re creating memories and infusing personal touches into your wardrobe. Final Thoughts: Why Every Home Should Embrace DIY Sublimation With winter here, why not embrace the warmth and creativity that custom sublimation shirts can bring to your life? By investing in the right tools and techniques, you can turn any simple shirt into your favorite winter wear. There’s immense joy in wearing something you’ve made yourself, and it’s a fantastic conversation starter! So gather your supplies and get started on your sublimation journey today. Inspire yourself and those around you with your creative flair!

Raleigh Better Home Living

Discover Essential DIY, Landscaping, Maintenance, and Design Tips for Raleigh Metro Homeowners on Our Media Site!

Green Street Constulting LLC

864 535 6456

AVAILABLE FROM 8AM - 5PM

ABOUT US

Empowering Raleigh Metro Homeowners: Discover the Latest Articles and YouTube Videos for Home Improvement Tips!

© 2026 CompanyName All Rights Reserved. Address . Contact Us . Terms of Service . Privacy Policy

Terms of Service

Privacy Policy

Core Modal Title

Sorry, no results found

You Might Find These Articles Interesting

T
Please Check Your Email
We Will Be Following Up Shortly
*
*
*