

Transform Your Serving Board: The Art of Wood Burning Gel
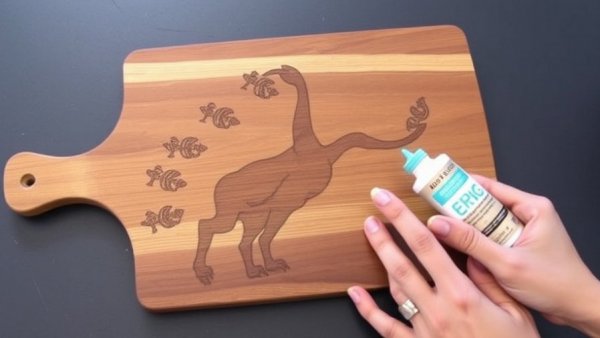
Creating a warm and inviting kitchen atmosphere is a joy for many homeowners, especially during the festive season. One wonderful way to personalize your space and share love through gift giving is by transforming a simple wooden serving board into a charming decoration using wood burning gel. This beautiful technique not only adds character to your kitchen but makes for an affordable and thoughtful gift.
Choosing the Right Wood Board for Your Project
When embarking on your wood-burning journey, the first step is selecting the perfect wooden board. You can easily find affordable options in craft stores or even the Target Dollar Spot! Make sure to look for a smooth, unfinished surface, as imperfections might show when the design is burned in. If you notice any labels or deep grain, consider turning the board over or sanding lightly to prep your canvas. Wood types like pine, oak, or cherry can yield different results, so embrace the natural variations that make each piece unique.
Getting Started: Applying the Wood Burning Gel
Once you have your board, it’s time to apply the wood burning gel. The gel typically comes thick and needs stirring to ensure smooth application. Using a reusable transfer design, firmly place it on your board. Add decorative elements that complement your central theme, allowing your creativity to flow. When you’re ready, spread the gel onto the open areas of the transfer—make the most of your supplies by scraping any excess back into the container. This step can lead to multiple projects with just one gel tub!
Activating the Design: The Role of a Heat Gun
This is where the magic happens! You will need a heat gun, as a hair dryer won’t provide the necessary temperatures to activate the gel properly. Keep the heat gun moving to ensure even burning, watching as your design darkens beautifully. This stage is thrilling as you witness the transformation of your board, creating a personalized piece that promises to engage your guests and family alike.
Perfecting Your Design: Seasonal Touches
After achieving that beautiful burned look, consider enhancing your serving board with decorative accents. For the festive season, a touch of red ribbon with greenery can convey a cozy holiday vibe. This allows your kitchen decor to remain versatile year-round—swap out the seasonal decorations easily without losing the personalized charm.
Year-Round Appeal and Long-Term Durability
The beauty of using wood burning gel lies in its permanence; once the design is burned in, it becomes part of the board, making this project more than seasonal—we’re talking timeless kitchen decor! The word 'home' etched into your serving board resonates beyond the holidays and adds warmth to your daily meals and gatherings.
Your Step-by-Step Roadmap to Crafting
1. **Select your wooden board**: Make sure it’s smooth and free from imperfections.
2. **Prep your design**: Use a transfer and wood burning gel, applying carefully and generously.
3. **Activate with heat**: Employ a heat gun for the final touch, making sure to maintain even heat application.
4. **Add accents**: Consider seasonal decor to make your design pop, and remember these can be interchanged based on the time of year.
By following these steps, not only do you create a delightful kitchen accessory, but you also foster skills and enjoyment in crafting that can lead to even more projects over time. Embrace the art of DIY with wood burning gel. Get ready to impress your family and friends with your crafting prowess!
Your Invitation to Create
Now that you’ve learned how to turn a simple wooden serving board into a stunning piece of art with wood burning gel, why not gather your crafting supplies and give it a try? Whether for your own kitchen or as a heartfelt gift, this project offers a chance to share warmth and creativity from your home. Dive into the world of DIY and let your creativity shine!



Write A Comment