Add Row
Add Element
cropper
update
Raleigh Better Home Living
update
Add Element
  • Home
  • Categories
    • DIY Projects
    • Smart Home Tech
    • Home Maintenance
    • Interior Design
    • Lawn and Garden
    • Design Trends
  • Adding Value to Your Home
  • Feature Local Businesses
July 23.2025
2 Minutes Read

Essential Guide to Clean Window Wells for Homeowners

Clean window wells with pristine basement window bordered by mulch.

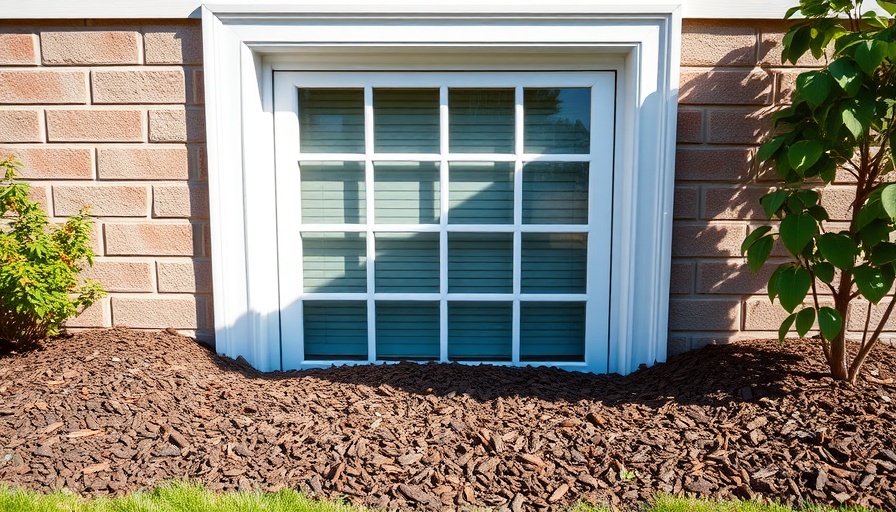
Why Your Window Wells Deserve Attention

Basement window wells serve important functions, not just offering natural light but also protecting your home from moisture and potential structural damage. However, as any homeowner knows, neglecting them can lead to silent but serious consequences. In addition to promoting a welcoming environment for pests, poorly maintained window wells can cause issues ranging from flooding to mold growth.

Prepare to Get Your Hands Dirty: Essential Tools

Before embarking on your cleaning journey, gather a few essential tools to make your job easier:

  • Gloves: Protect your hands while handling debris.
  • Small shovel or garden trowel: Ideal for scooping out mud and dirt.
  • Bucket or trash bag: For collecting the debris you pull out.
  • Wet/dry vacuum: Optional, but it’s incredibly useful for sucking up stubborn dirt and standing water.
  • Hose with spray nozzle: To rinse down the walls of the window well.
  • Scrub brush: For tackling any remaining grime.
  • Drain snake: If your drainage is clogged, this tool can save the day.

The Step-by-Step Cleaning Process

With your tools ready, let’s dive into the cleaning process:

  1. Remove All Debris: Start by clearing out visible debris like leaves and twigs and ensure to remove any cover you may have.
  2. Check the Drainage: Look for signs of standing water, indicating a clogged drain. Pouring water into the drain can help you check its function.
  3. Scrub the Window and Well Walls: Rinse off dirt first, then use soapy water and a scrub brush where needed.
  4. Replace Gravel If Necessary: Fresh gravel not only enhances the aesthetics but also reinforces drainage.
  5. Let It Dry: A thorough drying process is crucial before putting any cover back on.

Keeping Critters at Bay

Aside from keeping window wells clean, it’s important to safeguard your space from sneaky animal visitors. Using commercial window well covers or creating a barrier with chicken wire can do wonders in deterring small animals from establishing residency.

Benefits of Maintenance Beyond the Aesthetics

Regular maintenance of your window wells does more than just keep your exterior looking neat. It actively participates in protecting your basement, compromising less with the elements and enhancing the longevity of your foundation. With just a little effort, you can save yourself from hefty repair bills while improving the overall health of your home.

Conclusion: Take Action Today!

In summary, cleaning your window wells is an essential aspect of home care that can translate into safeguarding your property. From preventing foundation issues to limiting pest invasions, maintaining these spaces should be a priority. The knowledge of how to clean window wells equips you to protect your sanctuary effectively. Start today; tackle those window wells, and enjoy the benefits of a safer, cleaner home!

Home Maintenance

2 Views

0 Comments

Write A Comment

*
*
Related Posts All Posts
12.07.2025

Insulating Your Walls: Costly Mistakes Homeowners Make

Update Choosing the Right Insulation for Your Home: A Cost and Value Comparison As homeowners often seek to maximize comfort and energy efficiency, understanding how to properly insulate walls can lead to significant savings in both heating and cooling costs. The video "Stop Wasting Money! Most Homeowners Are Insulating Walls Wrong" delves into this crucial topic, presenting various insulation options while analyzing their effectiveness and cost. So, which insulation method should you choose for your shed or garage? Let's break down the insights and findings.In the video 'Stop Wasting Money! Most Homeowners Are Insulating Walls Wrong,' Scott highlights vital insights into wall insulation options, prompting a deeper analysis of smart choices for insulation. Understanding Insulation Options: Rockwool, Fiberglass, and Spray Foam In the clip, host Scott reviews three primary insulation options: fiberglass, rockwool, and spray foam—two of which are traditional materials, with spray foam being a newer contender. Fiberglass insulation offers an R-value of approximately 13 and is widely recognized for its affordability and availability; however, it can be irritating to work with due to its itchy fibers. Rockwool, on the other hand, boasts an R-value of 15 and provides additional benefits such as moisture resistance and ease of handling, making it a more attractive option despite the higher cost. Further on, Scott introduces two spray foam products—Great Stuff and a more advanced Stanley kit—both designed to create an airtight seal. However, he highlights a shocking revelation: the dramatic cost differences among these options. While fiberglass insulation may cost around $18 to cover 32 square feet, spray foam can soar to a whopping $150, making it impractical for most DIY enthusiasts. This stark comparison invites homeowners to consider both performance and budget when choosing insulation solutions. Hidden Costs and Benefits of Insulation Choices When selecting insulation, it is crucial to consider not just the upfront costs but also the long-term benefits. For homeowners in the 40 to 65 age range, investing in higher-quality materials like rockwool could pay dividends in terms of reduced energy bills and improved comfort year-round. Although the initial investment may be higher, the potential for lower maintenance and less risk for issues such as mold growth is significant. Consider this: by using rockwool, you would not only sidestep the itchy fibers of fiberglass, but also create a more durable environment that repels moisture, which is particularly beneficial if you're storing valuable items in your shed. Cost-Effective DIY Strategies for Insulation For those eager to embrace DIY home repairs, it’s essential to arm yourself with knowledge before diving into any insulation projects. Homeowners should evaluate their specific needs, considering factors like the structure of the building and local climate conditions. In Scott’s video, he stresses the importance of proper application and technique. Whether you're choosing fiberglass or rockwool, ensure you handle the materials carefully to avoid reducing their effectiveness. Moreover, Scott's video provides excellent insights into tools and techniques that can help save both time and money. His step-by-step explanations guide viewers on how to approach projects methodically—an invaluable lesson for any DIYer. Taking Action: Your Pathway to Improved Home Insulation As a final note, the insights from Scott’s video serve as a springboard for homeowners looking to enhance their property's energy efficiency through proper insulation. Understanding the pros and cons of various materials can lead to informed choices that align with your budget and maintenance capacity. If you're considering an insulation project, utilize online resources, like videos and tutorials, to equip yourself with the knowledge necessary for successful implementation. Making educated decisions now can truly pay off in the long run. So, before you insulate your walls, take a moment to weigh your options. Consider the comparisons of cost, ease of installation, and the long-term benefits. For those interested in learning more and embarking on DIY projects, check out Scott's other videos to empower your home improvement endeavors. The right choices today can lead to significant savings and comfort tomorrow!

12.06.2025

Why Most Homeowners Insulate Shed Roofs Wrong: Key Insights for You

Update The Importance of Proper Shed Insulation When it comes to maintaining an optimal environment in your shed, proper insulation is key. Many homeowners mistakenly insulate their shed roofs without understanding the best practices, which can lead to numerous problems. Insulation not only helps regulate temperature but also protects the structure from moisture and pest infestations. Understanding how to insulate correctly can save you time, money, and frustration in the long run.In Most Homeowners Insulate Shed Roofs WRONG (Watch This!), the discussion dives into common errors made in shed insulation, prompting us to analyze critical elements to ensure optimal performance and efficiency. Common Mistakes Homeowners Make One common mistake is using the wrong type of insulation material or installation method. Many homeowners choose inexpensive materials that might not provide effective thermal resistance. Furthermore, failing to seal any gaps around insulation can lead to heat loss and excessive condensation. Think of it like wrapping a gift. If the wrapping paper has holes or tears, the present is no longer well-protected. The same goes for your shed; gaps in insulation lead to inefficiencies, making the structure more susceptible to extreme temperatures. Choosing the Right Insulation Material There are various insulation materials available, including fiberglass, foam boards, and spray foam. Each type has its advantages and disadvantages. For instance, fiberglass is affordable and widely used but can be difficult to install correctly without professional assistance. Spray foam, while more expensive, provides excellent coverage and air sealing, minimizing drafts. For homeowners aged 40 to 65, understanding these materials becomes crucial in making informed decisions. Investing in the right type of insulation can greatly increase your shed's functionality and lifespan. Benefits of Proper Shed Insulation Proper insulation not only maintains a stable temperature but also contributes to energy conservation. In colder climates, for example, insulated sheds can keep tools and equipment at optimal temperatures, preventing costly damage from freezing. In addition, insulating your shed can also increase its utility, allowing you to use it as a workspace or a comfortable retreat. Future Trends in Shed Insulation As the demand for eco-friendly building practices rises, more insulated products are becoming available, including recycled materials. Homeowners are increasingly seeking sustainable options that not only enhance efficiency but also minimize environmental impact. Moreover, as homeowners invest more in outdoor living spaces, the focus on multi-functional structures like sheds is growing. This means that better insulation is not just about maintaining temperatures; it's about creating versatile spaces. Making Informed Decisions Before starting your insulation project, assess your shed's needs. Consider factors such as size, climate, and intended use. While you might be tempted to cut costs with cheaper insulation, the benefits of quality materials far outweigh the initial investment. A well-insulated shed can lead to lower maintenance costs and enhance the overall value of your home, making it a wise investment for the future. Actionable Insights for Homeowners Now that you understand the importance of proper insulation, it’s time to act. Begin by researching the best insulation options for your shed and evaluating your local climate’s needs. Consult a professional if necessary, or find reliable DIY guides online to help you navigate the installation process. You're not just protecting your tools; you're increasing the longevity and utility of your shed. If you're passionate about home improvement and wish to bolster your property's value, exploring DIY projects like shed insulation can be an excellent step forward.

12.03.2025

Transform Your Shed: Avoid Common Insulation Mistakes for a Comfortable Space

Update Understanding the Importance of Proper Shed Insulation As you embark on the journey of transforming a simple storage shed into a comfortable workspace, recognizing the necessity for proper insulation becomes paramount. A well-insulated shed not only provides protection against extreme weather conditions but also enhances energy efficiency, leading to cost savings in the long run. Yet, many homeowners inadvertently make critical errors when insulating their shed roofs, which can result in costly repairs and health concerns due to mold and moisture.In 'Most Homeowners Insulate Shed Roofs WRONG (Do This Instead)', the video discusses crucial insulation techniques, prompting us to explore these insights further and analyze how they can help homeowners. The Right Materials for Insulating Your Shed In the quest for effective insulation, the material you choose plays a vital role. In a recent discussion, common insulation types were evaluated: fiberglass insulation, rockwool insulation, foam board, and spray foam. However, Scott from Everyday Home Repairs advocates for rigid foam board insulation, which gained significant popularity among viewers, especially for its ease of installation and cost-effectiveness. This foam board, with an R-value of 10, provides valuable thermal resistance, essential for maintaining a comfortable indoor environment. The price range of $350 to $400 for materials is a small investment for the benefits it yields. Scott emphasizes that opting for rigid foam boards prevents serious mistakes, particularly regarding ventilation, which this article will address. Avoiding Common Mistakes During Insulation One of the predominant errors homeowners make is overlooking the installation of adequate ventilation. Insulating a shed without ensuring proper airflow can trap moisture, creating a conducive environment for mold growth. For Scott’s shed, he successfully avoided this pitfall by ensuring ventilated spaces between the roof surface and the insulated area. This foresight not only preserves the integrity of the roof structure but also safeguards the health of those using the shed. When insulating, it is vital to maintain the cavities between rafters to allow air to circulate. The implementation of vents on both the high and low sides of the shed facilitates proper ventilation, reducing the risk of condensation and moisture buildup. The Process of Installing Foam Board Installing foam board insulation can be a straightforward process. As described by Scott, the key is to measure and cut the boards accurately to fit snugly between rafters. Using tools like an Olaf blade and GRK screws provides a quick and efficient installation method. Additionally, the use of specific washers enhances the security of the panels to the rafters, ensuring they remain firmly in place. It is critical to drill through the wood structure to create a reliable hold, as this can prevent air leaks that compromise insulation effectiveness. Sealing It Up: Importance of Joint Treatment Once the foam boards are installed, sealing the seams is crucial for achieving optimal insulation performance. Scott recommends using strong seam tape, which bonds effectively yet is easier to break off than traditional tape options. This detail might seem minor but pays off significantly by reducing gaps that could allow air and moisture to penetrate. Conclusion: Your Next Steps Towards a Well-Insulated Shed Properly insulating your shed can transform it into a versatile home office or relaxation space, free from the threats of moisture and mold. With insights from the video, “Most Homeowners Insulate Shed Roofs WRONG (Do This Instead),” you now have a roadmap to avoid common pitfalls and make informed decisions about materials and methods. Take advantage of community resources—many homeowners, including Scott, are eager to share their experiences and help others through the process. Don’t hesitate to reach out for further advice, and consider creating detailed plans and budgets before starting your insulation project. With the right preparation, your shed can become the ultimate functional area you’ve always wanted.

Terms of Service

Privacy Policy

Core Modal Title

Sorry, no results found

You Might Find These Articles Interesting

T
Please Check Your Email
We Will Be Following Up Shortly
*
*
*