

cropper
Raleigh Better Home Living
  • Home
  • Categories
    • DIY Projects
    • Smart Home Tech
    • Home Maintenance
    • Interior Design
    • Lawn and Garden
    • Design Trends
    • Draft or Deletes
  • Adding Value to Your Home
  • Feature Local Businesses
June 26.2026
3 Minutes Read

How to Fix a Burst Pipe Without a Plumber: DIY Tips for Homeowners

Plumbing fittings comparison for fixing burst pipe without a plumber.

Mastering Home Repairs: A Practical Approach

When looking to save money on home repairs, many homeowners embark on the DIY journey. This is especially true when unexpected issues arise, such as a leaking pipe or broken fixtures. Following the recent video example titled "How I Fixed a Burst Pipe Without a Plumber," we delve into how simple tools and a bit of knowledge can help homeowners tackle plumbing challenges effectively and affordably.

In "How I Fixed a Burst Pipe Without a Plumber," the video discusses practical DIY techniques that can save homeowners considerable repair costs, prompting a deeper look into how individuals can master home repairs themselves.

Understanding the Basics: Why DIY?

With the right tools and resources, anyone can fix plumbing issues that arise in their home. Homeowners in the 40 to 65 age range often find themselves weighing the costs of professional plumbing services against the potential savings of doing the job themselves. The video presents a prime example, showcasing how fixing a split copper line can save hundreds of dollars—$4,200 for a pro installation versus $47 for parts. This significant cost difference isn't just appealing; it empowers homeowners to feel confident in their ability to tackle repairs.

The Right Tools Make All the Difference

In the video, the creator highlights the Sharkbite Max as an ideal solution for DIY plumbing. The tool allows for quick and straightforward repairs, especially helpful for those who might not be familiar with soldering techniques. The slip coupling feature is particularly beneficial in tight spaces, making it a go-to choice in many renovation projects. Understanding and utilizing tools like the Sharkbite Max can make a huge impact on efficiency and effectiveness.

A Comparatively Accessible Solution

One of the compelling points brought up in the video is the comparison between DIY solutions like Sharkbite and professional options like ProPress fittings. The presenter reasons that while professionals may argue the longevity of soldering, mechanical crimping methods often yield similar results when properly installed. This perspective is crucial for DIY enthusiasts, as it demystifies the process and reinforces the confidence in using accessible methods that don’t compromise on quality.

Why Leaving It to Professionals Isn't Always Necessary

The discussion also raises an important question: When is hiring a professional warranted? Many homeowners may automatically think they need to call in a plumber for repairs. However, the video emphasizes that minor repairs, particularly those that can be completed within a few minutes—with the right tools—can often be tackled by diligent DIYers. This mindset not only promotes self-sufficiency but also fosters a sense of accomplishment.

Future Trends in Home Maintenance

Home maintenance is evolving with technology, becoming increasingly DIY-friendly. Tools are becoming more user-oriented, allowing even those who may feel intimidated by home repair to take charge. Understanding this trend can help homeowners make informed decisions about projects and renovations, essentially preparing them for future challenges without needing professional help.

Common Pitfalls and How to Avoid Them

While embarking on DIY projects can be empowering, there are common misconceptions that should be addressed. Many individuals believe that DIY will always be cheaper than hiring a professional, which is not always the case—especially with larger projects that require more than just basic tools or knowledge. It's essential that homeowners realistically assess their skills, budget, and the complexity of the tasks at hand before diving into DIY.

More Than Just Repairs: Empowering the DIY Mindset

Beyond saving money, the DIY approach to home repairs can foster a greater appreciation for one's living space and instill a sense of pride in homeownership. As seen in "How I Fixed a Burst Pipe Without a Plumber," every repair is an opportunity for homeowners to engage with their home and understand the intricacies of its systems—a beneficial long-term investment.

Conclusion: Take Charge of Your Home Repairs Today

Whether you're dealing with a split pipe or considering other home maintenance projects, it's vital to feel empowered and informed. Homeownership requires both skill and confidence. So, take inspiration from the insights shared in the video and don't shy away from tackling repairs head-on. With the right tools and information, you too can become the capable DIYer you aspire to be.

Home Maintenance

26 Views

0 Comments

Write A Comment

*
*
Please complete the captcha to submit your comment.
Related Posts All Posts
11.09.2026

Transform Your Space: Build the Ultimate Tote Storage System

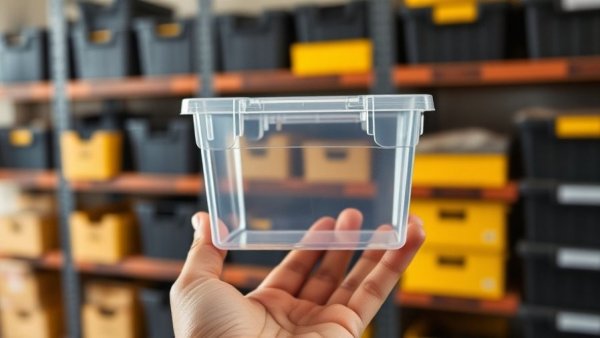
Update Streamlined Storage Solutions for Your Home In a world where space management proves increasingly vital, homeowners are searching for efficient solutions to tackle clutter. Enter the ultimate tote storage system—a practical and customizable DIY project that promises organization and functionality. Whether you’re an avid do-it-yourselfer or simply looking to declutter your home, creating a custom tote storage system not only enhances your living space but also showcases your creativity.In 'I Built the Ultimate Tote Storage System', the discussion dives into practical storage solutions, exploring key insights that sparked deeper analysis on our end. Understanding the Importance of Organization Home organization is not merely an aesthetic choice; it significantly impacts mental clarity, productivity, and overall well-being. From neatly stored holiday decorations to tools and gardening supplies, maximizing your storage can create a more harmonious environment. The tote storage system caters to various needs with adjustable sizing and configurations to organize everything from small items to large bins, turning chaos into structured order. Creating Your Own Tote Storage System Building your own storage system doesn't have to be overwhelming. By following a structured plan, like the one discussed in the video 'I Built the Ultimate Tote Storage System,' you can design an efficient and tailored rack for your totes. Begin with a clear layout plan, including designated spaces for various tote sizes, such as the classic 27-gallon container, smaller 2-gallon bins, and even the tiny 0.09-gallon size perfect for organizing screws and fasteners. Step-by-Step Build Guide To embark on this DIY journey, you'll need some essential tools and a straightforward approach. Start with accurate measurements of your space and the totes. Once armed with your supplies—2 by 4 lumber, a miter saw, and screws—you can construct a stable framework that incorporates your workbench and integrates the pegboard for additional vertical storage options. Using spacers during assembly can save time and ensure everything aligns correctly, allowing for a sturdy and visually appealing structure. And remember, choosing the right screws is pivotal; opt for heavy-duty screws over drywall screws for maximum durability. The Value of Adaptability in Design The versatility of the tote storage system is a game changer. You can adapt your design to grow with your needs. For instance, including pegboards enables you to hang tools and small items, making them easily accessible without taking up valuable tabletop space. Planning your layout thoughtfully allows for optimizing the functionality of your workspace and promotes ease of use. Future-Proofing Your Storage Solutions Predicting future needs is a wise step when planning your storage system. Choose designs that allow for expansion or reconfiguration as your storage requirements evolve. For instance, integrating additional columns or shelves can accommodate future tote sizes or categories you may incorporate down the line. Taking these steps now will ensure you won’t be redoing your efforts to fit new items in the future. Final Thoughts and Call to Action Engaging in a DIY project like building the ultimate tote storage system is not only beneficial for your home but also a rewarding and creative outlet. Not only will you reclaim lost space in your home, but you will also gain skills and confidence in tackling future projects. Explore more DIY ideas and start enhancing your home storage today! Ready to take control of your home storage? Discover the detailed plans and resources available to assist you in your DIY initiatives. A well-organized home is just a project away!

10.02.2026

Master DIY Retaining Wall Construction: Essential Steps for Homeowners

Update Transforming Unusable Spaces: The Power of a DIY Retaining Wall Retaining walls are not just functional structures; they can breathe life into sloped and uneven yards, creating usable outdoor spaces. Homeowners aiming to enhance their property value and utility are discovering the benefits of undertaking DIY projects, particularly when it comes to building retaining walls. In How To Build A DIY Retaining Wall | Complete Step-By-Step Guide, the intricate process is laid out from foundation to finish, offering insightful tips on how to navigate this significant home project.In How To Build A DIY Retaining Wall | Complete Step-By-Step Guide, the discussion dives into best practices for building a retaining wall, exploring key insights that sparked deeper analysis on our end. Understanding the Foundation: A Strong Start The first step in constructing a retaining wall is setting up a solid foundation. As highlighted, prepping the base includes removing any organic materials and ensuring an 18 to 24-inch-wide area of stable soil. This vital groundwork not only supports the wall but also prevents future issues like settling and erosion. Tools like a front loader can expedite this crucial digging process, making it both efficient and effective. Choosing the Right Materials: What to Look For Not all blocks are created equal. For homeowners tackling this project, choosing commercial grade retaining wall blocks over common residential ones can make a significant difference in durability and longevity. The transcript emphasizes using weights that exceed 70 lbs for enhanced strength. This insight is invaluable for readers looking to ensure their hard work pays off for years to come. At local landscape centers, homeowners can gain expert advice and access to a varied selection better suited for retaining walls than traditional home improvement stores. The Importance of Drainage: Keeping Your Wall Intact Effective drainage is essential, particularly for those installing walls in areas with significant slopes or ravines. The video discusses the correct use of perforated pipes and geotextile fabric to ensure water flows away from the wall, reducing pressure that could compromise its integrity. By understanding the role of drainage in their project, homeowners can avoid costly damages in the future, making this information an essential takeaway. Step-by-Step Progress: Methodology Matters The process outlined within the video is methodical and thorough. Starting with the first course of blocks involves careful layout, checking for level with tools like a line bubble level, and ensuring precision. Each layer builds upon the last, and accuracy in measurement is underscored to prevent future adjustments or rework. This compelling narrative highlights that patience and attention to detail can bear fruits in the form of a structurally sound and aesthetically pleasing wall. Investing Time and Money: What You Should Prepare For Equipping yourself with the right knowledge before starting the project can save significant time and money. The video features a total labor estimate of 42 hours, costing around $1,600 for materials—figures vital for homeowners budgeting their DIY undertaking. By investing time in understanding the total costs, they can make informed choices, whether they decide to take on the project themselves or hire professionals. Final Touches: Completing with Precision Once the blocks are laid, the top capping process comes into play, requiring careful adhesive application to hold everything together. The video also advises compacting in layers, specifically emphasizing not to add too much gravel at once, which might lead to settling issues. Such practical insights provide viewers with tangible benefits, ensuring they have a solid connection to their finished product. A DIY Enthusiast's Journey: Engaging in Home Improvement As homeowners explore the process of building a retaining wall, they are not merely improving their landscapes but also embarking on a journey of personal growth and satisfaction. Learning new skills, facing the challenges of physical labor, and ultimately ending with a completed project are incredible experiences that enrich one's connection to their home. Overall, the How To Build A DIY Retaining Wall video serves as a comprehensive guide, aiding homeowners in transforming their outdoor spaces while reinforcing their investment in their property. With the right approach, DIY enthusiasts can embark on this rewarding journey, creating both functional and attractive landscapes.

08.27.2026

Build a Secure Shed: Essential Foundation Insights Every Homeowner Needs

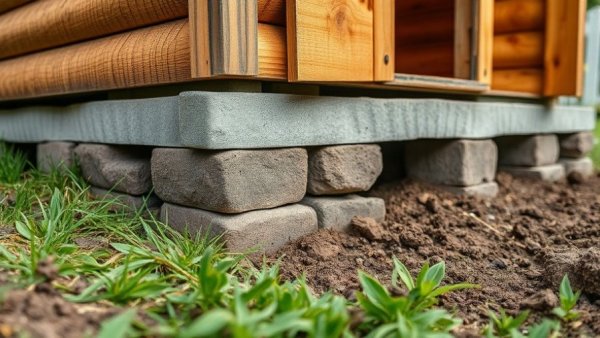
Update Understanding the Basics: Why Shed Foundations Matter When considering the construction or installation of a shed, many homeowners often overlook the importance of a proper foundation. The video titled Don't Set Your Shed on Blocks Until You See This underscores the crucial aspects of creating a secure and stable base for any shed. A sound foundation not only affects the structural integrity of the shed but also influences its overall longevity, usability, and even local zoning law compliance.The video Don't Set Your Shed on Blocks Until You See This presents vital information on the significance of suitable shed foundations, leading us to expand on these insights for homeowners. The Risks of Improper Shed Foundations One significant takeaway from the video is the potential risks associated with an inadequate foundation. Setting up your shed on blocks without considering local conditions can lead to drainage problems and erosion over time. This may create an unstable structure, making the shed susceptible to water damage, pests, or even collapse in severe weather conditions, which can ultimately lead to costly repairs. Local Climate and Its Impact on Shed Design Factors such as soil composition, drainage, and moisture levels vary significantly from region to region. Homeowners should research their specific location to identify the most suitable foundation type. For instance, homeowners in areas with heavy rainfall may benefit from a concrete slab or elevated wooden foundation, while those in drier regions might find that a simple gravel base suffices. Such considerations are essential to avoid future headaches and expense. Benefits of Investing in a Quality Shed Foundation An initial investment in a sound foundation can have lasting positive effects, especially for homeowners planning to use their shed as a workspace or storage solution. A solid foundation enhances the efficiency of the space, minimizes moisture-related issues, and increases the overall value of your property. Sheds that are secure and moisture-free can be excellent assets to your home, serving as workshops, gardens, or storage for recreational equipment. Common Misconceptions: Clearing Up the Myths Many homeowners might believe that placing their shed directly on the ground is acceptable to save time and money. However, this misconception can lead to significant problems over time. The video emphasizes that without a proper foundation, sheds may warp or be eaten away by termites and other pests, which could have been avoided with a little foresight and planning. By addressing these myths, homeowners can make more informed decisions when setting up their sheds. Choosing the Right Type of Foundation for Your Shed The video presents several options for shed foundations, including: Concrete Slabs: Best for stability and pest prevention, but typically more costly. Wooden Beams: An adjustable option but can be susceptible to moisture if not properly cared for. Gravel Bases: A budget-friendly choice that promotes drainage, ideal for many climates. These options highlight that your choice should reflect your local conditions, shed usage, and budget. Step-by-Step Guide to Constructing Your Shed Foundation To correctly set your shed foundation, follow these key steps: Research local zoning laws and regulations related to shed installation in your area. Assess your land to identify the best type of foundation according to drainage and load-bearing requirements. Mark out the area for your foundation, ensuring it's level and properly positioned. Gather your materials based on the type of foundation chosen and begin construction, ensuring all levels and dimensions are accurate. Mastering these steps can significantly affect the quality and longevity of your shed. Conclusion: A Wise Investment for a Lasting Structure In conclusion, effective and careful planning of your shed’s foundation cannot be understated. As highlighted in the video Don't Set Your Shed on Blocks Until You See This, investing time and resources into establishing an appropriate foundation will pay dividends in performance and longevity. Homeowners should take heed of these insights to make informed decisions that enhance their home functionality while protecting their investments from future risk. With considerations for climate, foundational types, and practical construction steps, equip yourself with the knowledge needed to build a solid foundation that will serve you well for years to come. Don't hesitate—get started on your shed project today and watch how a sturdy foundation sets you up for success.

Raleigh Better Home Living

Discover Essential DIY, Landscaping, Maintenance, and Design Tips for Raleigh Metro Homeowners on Our Media Site!

Green Street Constulting LLC

864 535 6456

AVAILABLE FROM 8AM - 5PM

ABOUT US

Empowering Raleigh Metro Homeowners: Discover the Latest Articles and YouTube Videos for Home Improvement Tips!

© 2026 CompanyName All Rights Reserved. Address . Contact Us . Terms of Service . Privacy Policy

Terms of Service

Privacy Policy

Core Modal Title

Sorry, no results found

You Might Find These Articles Interesting

T
Please Check Your Email
We Will Be Following Up Shortly
*
*
*