

cropper
Raleigh Better Home Living
  • Home
  • Categories
    • DIY Projects
    • Smart Home Tech
    • Home Maintenance
    • Interior Design
    • Lawn and Garden
    • Design Trends
    • Draft or Deletes
  • Adding Value to Your Home
  • Feature Local Businesses
November 05.2026
3 Minutes Read

Unlocking the Benefits of Partial Home Staging for Sellers

Modern living room illustrating partial home staging benefits

Understanding Partial Home Staging: A Targeted Approach

When it comes to preparing a home for sale, not every room needs to be fully staged. Enter partial home staging, an approach that emphasizes select areas of the home while utilizing existing furniture and decor that already enhance the property’s appeal. Homeowners often find this method effective, especially when some spaces in their home are already stylishly furnished, while others might require a bit of attention before listing.

How Partial Home Staging Works

The heart of partial home staging lies in its targeted focus. Rather than overhauling an entire home, a professional stager assesses which rooms are visually appealing and which require enhancement. For instance, sellers may have a stunning living room but a lackluster primary bedroom or dining area. The stager’s job is to evaluate the existing furniture and decor, prioritize which areas need staging, and determine how to improve the overall presentation without incurring extensive costs.

This method shines particularly in homes where some rooms are completed nicely, while others feel empty or cluttered. By removing unnecessary pieces or repositioning current furniture, a staged room can create a more inviting atmosphere for potential buyers. This strategic process can also provide clarity in spaces that may feel disconnected from one another, establishing visual flow throughout the home.

Choosing the Right Spaces to Stage

In partial home staging, prioritizing which areas to stage is crucial. Typically, the most notable spaces that buyers notice are the living room, kitchen, dining area, and primary bedroom. These rooms significantly shape the initial impression of the property, and sellers should focus their energy on them when planning the staging strategy.

By considering which rooms will feature prominently in photographs, potential buyers can have a cohesive experience when touring the home. Not every room requires equal attention; sellers should leverage their strengths and focus on enhancing the visual appeal of the areas that will make the most impact. This selective strategy can produce a uniform first impression without saturating each room with new decor.

Preparing for Photos and Showings

High-quality listing photos are vital in today’s real estate market, often being the first glimpse potential buyers get of a property. Rooms that may seem organized in person can appear cluttered or chaotic in photographs. It’s essential to declutter surfaces and remove any items that may distract from the room’s features before capturing images for listings.

Setting furniture in a manner that creates clear sightlines also plays a key role in successful staging. Homeowners should maximize natural light, placing curtains and blinds strategically, and creating well-defined spaces that highlight the room’s size and purpose, making it easier for buyers to envision themselves living there.

Common Challenges and Solutions in Partial Home Staging

Like any home preparation process, partial home staging comes with its own unique challenges. Homeowners often grapple with figuring out which pieces to keep or where to place certain items. Seeking the guidance of a professional stager can alleviate these concerns, as they can make recommendations based on experience, ensuring buyers see the most appealing aspects of each space.

Additionally, living in a staged home can be challenging. A practical routine for putting away frequently used items can help maintain the impeccable look required for showings while keeping daily life comfortable. Creating designated spots for your necessities can streamline this process, ensuring the home remains buyer-ready at a moment's notice.

The Value of Partial Home Staging

Ultimately, the value of partial home staging lies in its ability to create an inviting atmosphere without overwhelming the seller's budget or time. With sellers balancing everyday life and the hectic nature of selling a house, this streamlined approach offers a practical solution that enhances the property’s marketability. Consider the advantages of engaging a stager to guide you in making decisions that will accentuate your home’s strengths.

In the competitive real estate landscape, maximizing a property’s appeal can significantly influence sale prices and timelines. If partial home staging resonates with you, explore working with a professional to tailor an approach that perfectly fits your home’s needs. Embrace this opportunity to showcase your home’s potential and connect with buyers looking for their next cherished space.


Interior Design

0 Views

0 Comments

Write A Comment

*
*
Please complete the captcha to submit your comment.
Related Posts All Posts
11.04.2026

Create a Festive Santa Sleigh Decoration for Your Home This Christmas

Update Transform Your Home This Holiday Season With a Stunning Sleigh Decoration The holiday season is upon us, and there's no better way to embrace the festive spirit than with creative DIY decorations. One standout option is a charming Santa sleigh crafted from a wood cutout, adorned with Chalk Couture transfers, and sparkling in shades of red and silver. This project not only adds holiday cheer to your home but also provides a fun and engaging activity for those looking to bring a personalized touch to their decor. Getting Started: The Basics of Creating Your Santa Sleigh This project begins with a beautifully shaped Santa sleigh wood cutout that acts as the canvas for your artistic flair. The sleigh, painted in a vibrant Cherry chalk paste, serves as a rich and warm base, perfectly echoing the festive palette of the season. Cherry is a popular choice among DIY enthusiasts, especially when paired with metallic accents like Silver Shimmer. When selecting your paints and transfers, focus on colors that not only complement each other but also pop against your chosen background. Why Surface Preparation Matters Before applying your Chalk Couture transfer, surface preparation is key. A well-prepared base ensures that your decoration not only looks great but also endures the test of time. Applying a thin coat of surface wax on the dried Cherry prevents the transfer from pulling the base color when removed. This crucial step adds a lovely sheen to your wooden cutout and enhances the overall finish of your project. Moreover, softening the grip of the transfer using a fuzzing cloth or even your shirt can make the application smoother, especially over freshly painted surfaces. Achieving the Perfect Silver Shimmer Effect The magic really happens with the application of Silver Shimmer. This dazzling paste is not just about aesthetics; it captures the essence of a winter night, making your Santa sleigh truly enchanting. A light, even layer fills the screen-printed design beautifully, and the key to success lies in careful technique—slowly peeling the transfer away earns you immaculate details. This method also allows for touch-ups in case of any missed spots, ensuring your sleigh dazzles. Creating a Festive Background Your Santa sleigh deserves a backdrop that enhances its charm. A simple black background works wonders in bringing forward the vibrancy of the Cherry and the shine of the Silver Shimmer. Positioning the sleigh at an angle makes it appear as if Santa is soaring through the night sky, adding a dynamic element to your display. The use of Titebond Quick and Thick Glue allows for precision in placement, making it easier to adjust your design if necessary. Adding the Finishing Touches: Twinkling Stars No festive decoration is complete without a sprinkle of stars! Mixing Silver Shimmer with a bit of water for splattering creates a twinkling effect reminiscent of a starry night. Using a toothbrush to flick this mixture across the background adds a unique flair, bringing a sense of magic to your Santa sleigh. This additional detail transforms your project from simple to spectacular, inviting admiration from all who see it. Wrapping Up Your DIY Holiday Project Once your sleigh is complete, you’ll have a beautiful holiday decoration that encapsulates the spirit of Christmas. This DIY project not only beautifies your home but also allows you to engage in a creative pursuit that can be shared with loved ones. By exploring your artistic side, you’re able to create something meaningful and visually appealing, making your home cozy for the holidays. As you prepare for the holiday season, consider adding this delightful sleigh cutout to your decor repertoire. Share your creations with friends and family, and perhaps even involve them in your next project!

10.30.2026

DIY Candy Cane Christmas Sign: Create Holiday Cheer at Home

Update Transform Your Home for the Holidays with DIY Decor As the holiday season approaches, many homeowners are looking for unique ways to infuse their living spaces with festive cheer. One delightful project is crafting a DIY Christmas sign featuring layered candy canes, a symbol of the season that evokes warmth and nostalgia. This project not only beautifies your home but also fosters creativity and personal expression. Gathering Your Supplies: The Essentials for a Beautiful Sign To create a stunning candy cane sign, you will need some essential supplies. A sturdy base, like a 16 by 11.5 oval board, serves as your canvas. Glossy chalk paste in blacks, whites, and reds will highlight your design, making it vividly pop against the background. Chalk Couture transfers are perfect for creating clear, beautiful images without the hassle of freehand painting. Additionally, having a few embellishments such as silver letters, greenery, a red bow, and other crafting tools will elevate your sign to the next level. Here’s a quick look: 16 by 11.5 oval board Chalk paste (black, white, red) Chalk Couture candy cane and snowflake transfers Silver JOY letters Greenery and decorative ribbon Hot glue gun Step-by-Step Process: Bringing Your Candy Cane Design to Life Begin your project by painting the oval board black; this rich background not only enhances the reflective silver letters but also provides a striking contrast to the bright red and white of the candy canes. Allow the board to dry completely to ensure your subsequent designs adhere correctly. Once dried, it’s time to apply the Chalk Couture transfer. Lightly fuzz the transfer before positioning it on the board to minimize stickiness. By alternating the direction of your candy canes, you can create a visually dynamic arrangement. Make sure to complement your candy canes with white snowflakes for a festive touch. For the first layer of your design, apply white chalk paste through the transfer. Quick removal of the transfer before the paste dries allows for crisp outlines of your design. If you want to reuse the transfer, be sure to wash it carefully and follow the same method for the second application. Once the base is dried, move on to painting your candy canes white. Attention to detail is key, and a soft brush can help fill in areas perfectly. Small imperfections can easily be corrected later, emphasizing the forgiving nature of this craft. Once dried, apply a light wax for protection. Finally, for the vibrant red layer—return the transfer to align with your initial white outlines and apply the red paste. This crucial layer breathes life into the candy canes, adding depth and dimension that will charm your guests. Add Personal Touches: Finishing Off Your Project To wrap up your beautiful candy cane sign, incorporate some greenery gathered from previous projects. It draws the eye and adds a homemade touch, especially if you've glued it onto a craft stick for easy placement. Finish with the silver JOY letters and a decorative red bow to nicely set the festive tone. Why DIY? The Benefits of Holiday Crafts Engaging in DIY projects like your candy cane Christmas sign not only beautifies your home but encapsulates the spirit of the holidays. Crafting allows for personalization, as each piece reflects your unique style and serves as a conversation starter when guests visit. Moreover, creating decorations together as a family can forge wonderful memories and traditions. Whether you explore the world of DIY to save costs or simply to indulge your creative spirit, such projects enhance your home’s warmth and welcoming appeal during the festive season, offering an inviting atmosphere for family and friends alike. This holiday season, consider crafting your own festive decor. Dive into this engaging project, express your creativity, and fill your home with the joy of the holidays!

10.29.2026

DIY Gingerbread Christmas Decor: Bring Warmth to Your Home

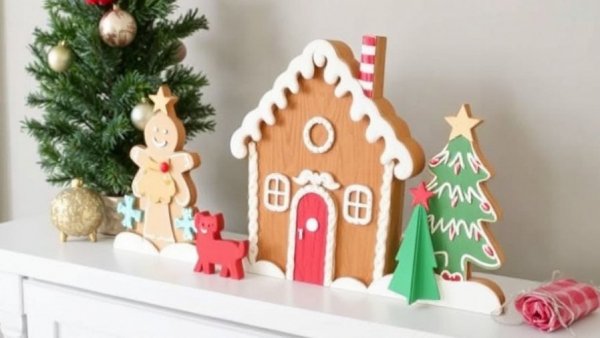
Update Create a Festive Atmosphere with DIY Gingerbread Decor The holiday season brings out the artist in many of us, allowing for creativity and nostalgia to intertwine. One charming way to embrace the festive spirit is through DIY gingerbread decor, a delightful craft that can easily become a family tradition. Using painted wood cutouts, snowy details, and some imagination, homeowners can create their own magical gingerbread scenes that warm the heart and home. Supplies That Spark Joy In preparing to create your own gingerbread decor, gather a few essential supplies. The foundation of your project might start with an oval wood background and gingerbread cutout, readily available in craft kits or local stores. Adding elements like greenery, berry, and heart cutouts not only enhances the visual appeal but also brings a splash of color that signifies the season. Additional materials include chalk paste paints, paint daubers, paintbrushes, and some natural elements to lend a truly festive feel. Painting the Gingerbread: A Touch of Whimsy To start your gingerbread creation, apply a warm brown base using a camel-colored chalk paste. The beauty of employing a paint dauber is that it allows excellent coverage with minimal brush marks, ensuring your creation starts off smooth and even. Once dry, it's time to add personality! Apply a cheerful pink for rosy cheeks and pull out a black paint pen for creating fetching eyes. Remember, the trick lies in the details, so feel free to add highlights or decorative dots to make your gingerbread truly special. Greenery and Holiday Cheer After the gingerbread is set, turn your attention to the holiday accents. Paint the hearts and berries with a vibrant cherry hue, ensuring they pop against the gingerbread backdrop. Likewise, the greenery can be enhanced by mixing two shades of green, such as pesto and fresh cut grass. This creates depth while complementing the warm tones of the gingerbread. Don’t forget to add sprigs of white paste to mimic snow, as it heightens the seasonal ambiance! Add a Dash of Distressing and Splatter To give your gingerbread a baked look, rub a bit of distress ink around the edges. It provides definition and brings the cutout to life. For an authentic touch, finish your project by adding black splatter paint. The technique of flicking paint from a toothbrush yields charming, uneven dots that infuse character into your creation. Just be sure to keep your area covered, as paint can travel farther than you anticipate! Why This Craft Matters Engaging in DIY crafts like these not only beautifies your spaces but also creates lasting memories during the holidays. It's an opportunity for families to bond, express creativity, and instill a sense of pride in homemade decor. As the tradition grows from year to year, so does the emotional attachment and joy this craftsmanship fosters. Sharing the Spirit of the Season Once your festive decor is complete, place it proudly in your home or surprise a neighbor with a handmade gift. This simple act promotes community spirit and showcases the artistry that resides in the heart of home and family. Plus, who wouldn't love to receive a personalized holiday keepsake? Your Turn to Dive In! With these tips and insights, it’s time to gather your supplies, let your creativity soar, and craft your unique gingerbread decoration. Embrace this season of joy and share it with loved ones, as there’s nothing more rewarding than bringing handmade charm into your home for Christmas.

Raleigh Better Home Living

Discover Essential DIY, Landscaping, Maintenance, and Design Tips for Raleigh Metro Homeowners on Our Media Site!

Green Street Constulting LLC

864 535 6456

AVAILABLE FROM 8AM - 5PM

ABOUT US

Empowering Raleigh Metro Homeowners: Discover the Latest Articles and YouTube Videos for Home Improvement Tips!

© 2026 CompanyName All Rights Reserved. Address . Contact Us . Terms of Service . Privacy Policy

Terms of Service

Privacy Policy

Core Modal Title

Sorry, no results found

You Might Find These Articles Interesting

T
Please Check Your Email
We Will Be Following Up Shortly
*
*
*